

 Set up docs MCP
Supported Postgres versions
Anything on or after Postgres 12
Enable logical replication
You don’t need to follow the below steps if the setting cloudsql. logical_decoding is on. This setting should mostly be pre-configured if you’re migrating from another data replication tool.
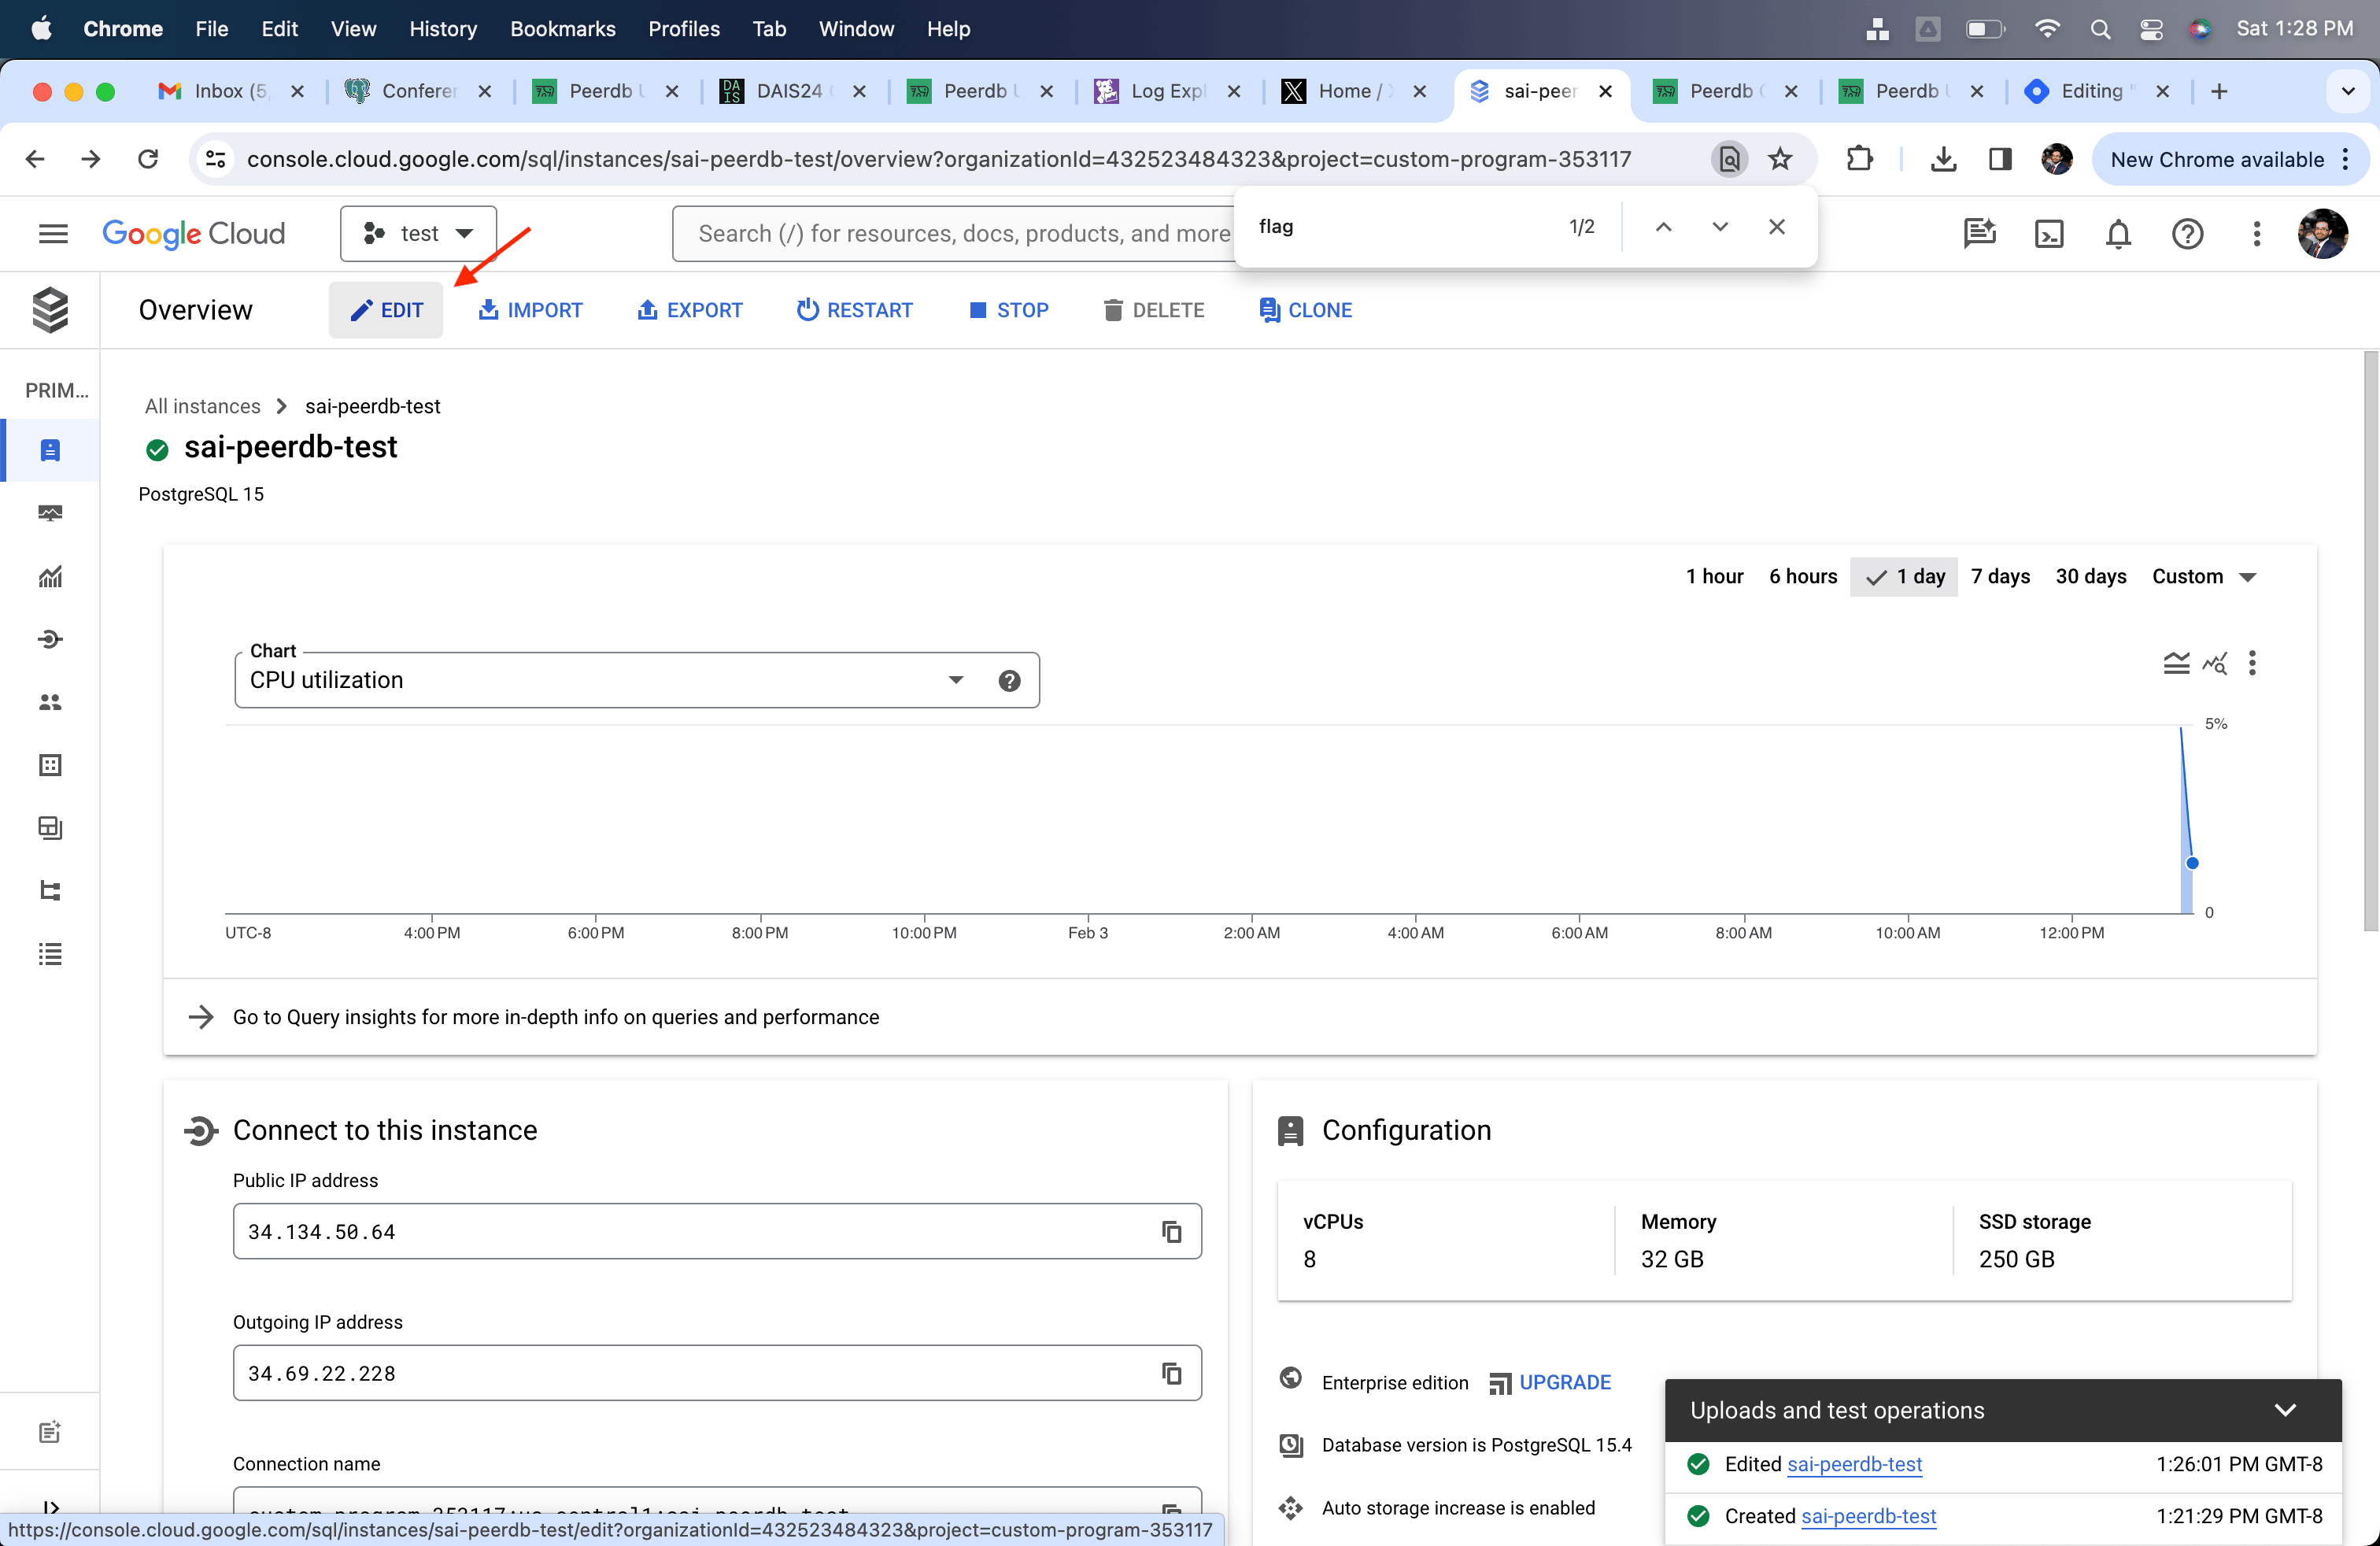
- Click on Edit button on the Overview page.
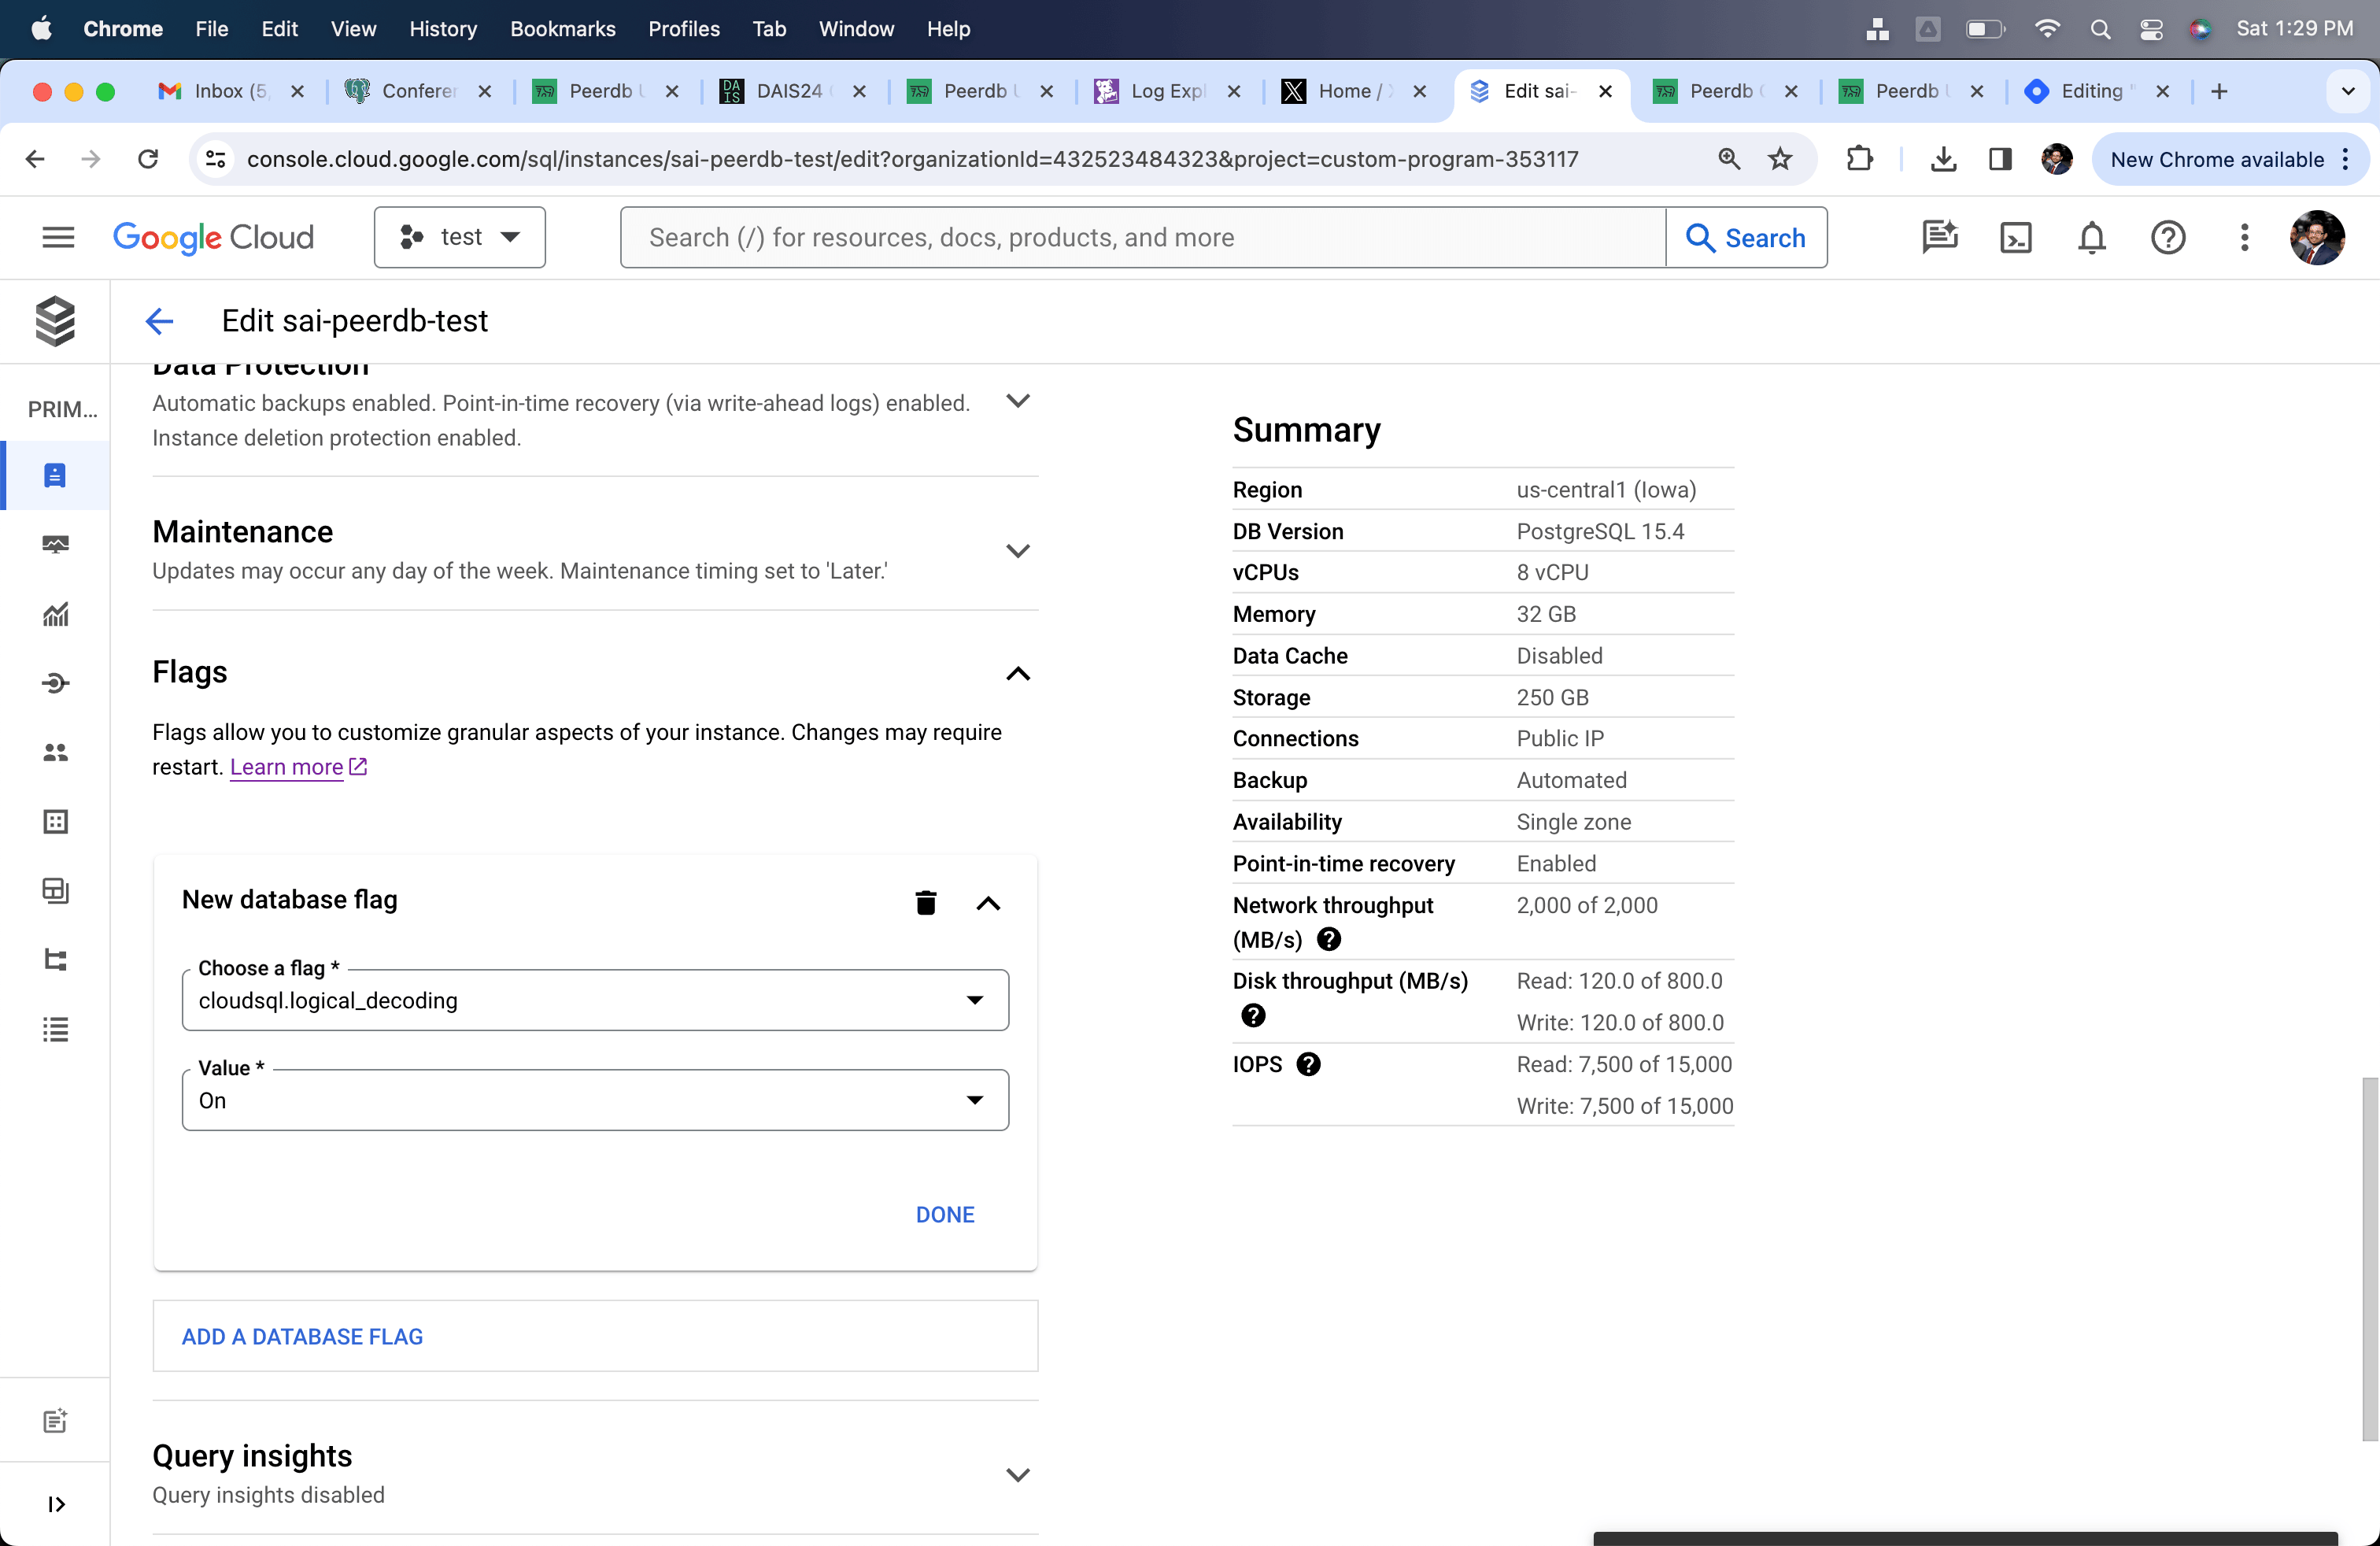
- Go to Flags and change
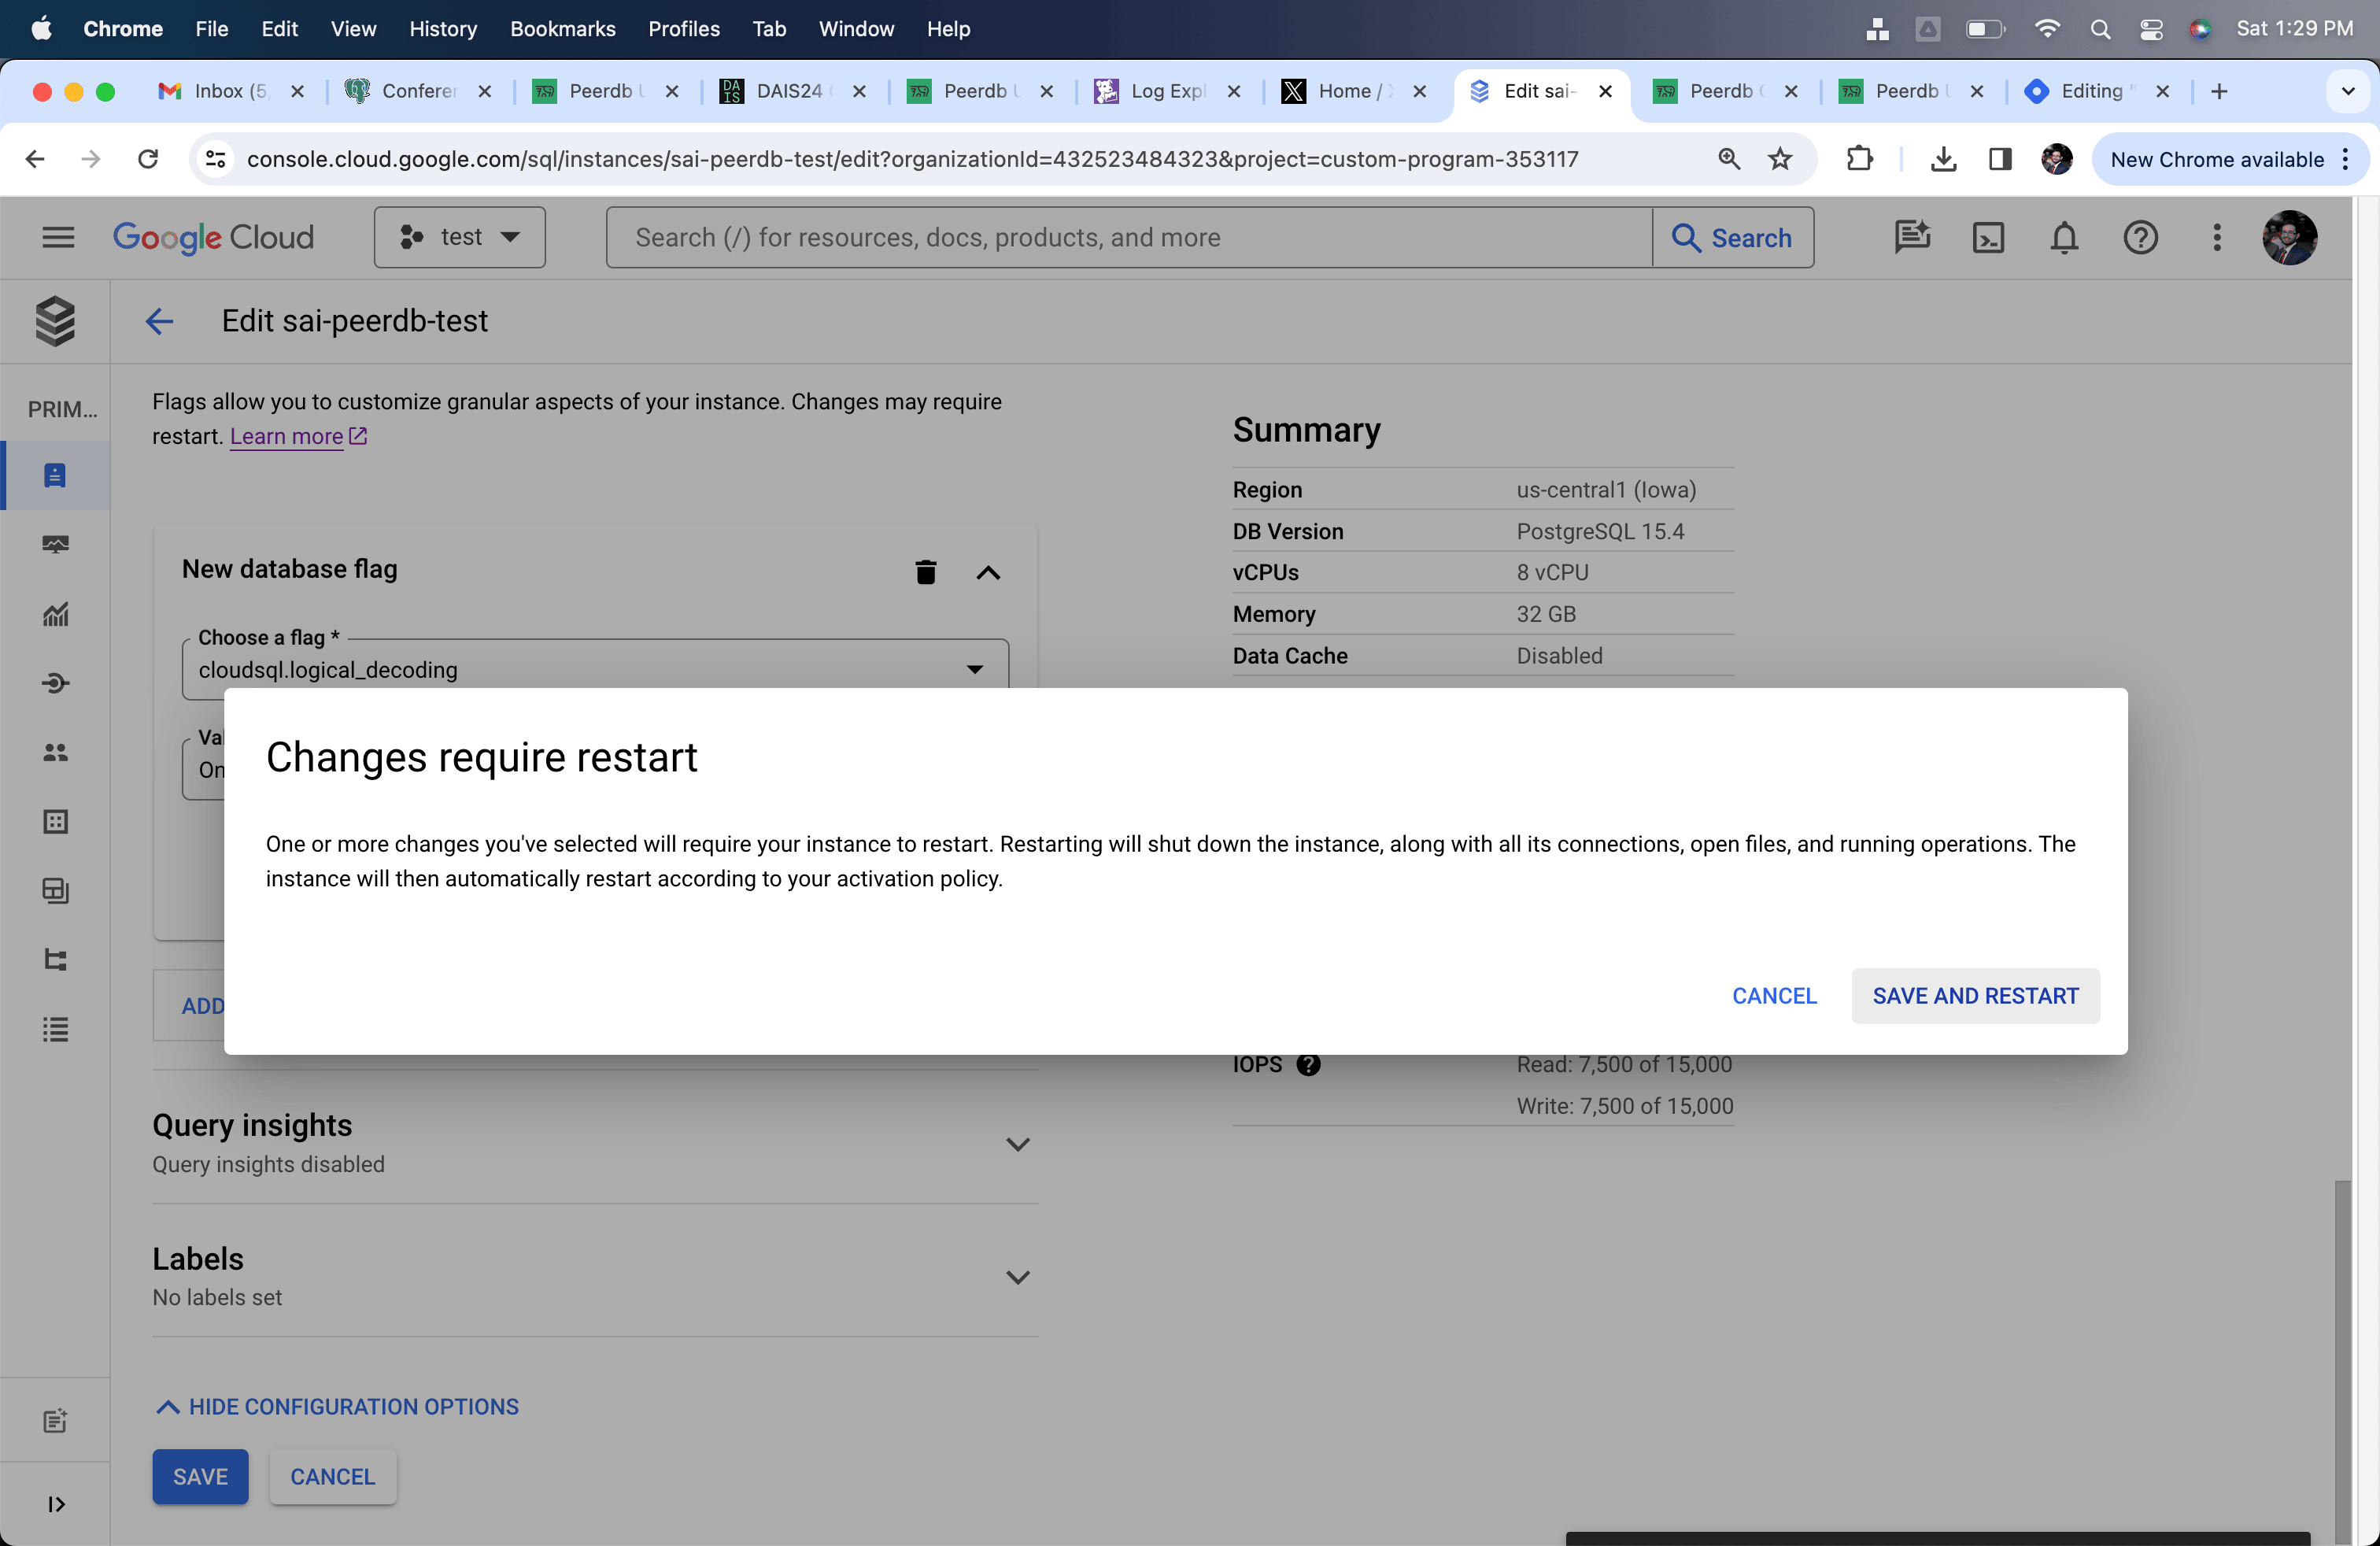
cloudsql.logical_decodingto on. This change will need restarting your Postgres server.
Creating ClickPipes user and granting permissions
Connect to your Cloud SQL Postgres through the admin user and run the below commands:
-
Create a dedicated user for ClickPipes:
CREATE USER clickpipes_user PASSWORD 'some-password'; -
Grant schema-level, read-only access to the user you created in the previous step. The following example shows permissions for the
publicschema. Repeat these commands for each schema containing tables you want to replicate:GRANT USAGE ON SCHEMA "public" TO clickpipes_user; GRANT SELECT ON ALL TABLES IN SCHEMA "public" TO clickpipes_user; ALTER DEFAULT PRIVILEGES IN SCHEMA "public" GRANT SELECT ON TABLES TO clickpipes_user; -
Grant replication privileges to the user:
ALTER USER clickpipes_user WITH REPLICATION; -
Create a publication with the tables you want to replicate. We strongly recommend only including the tables you need in the publication to avoid performance overhead.
-
To create a publication for specific tables:
CREATE PUBLICATION clickpipes FOR TABLE table_to_replicate, table_to_replicate2; -
To create a publication for all tables in a specific schema:
CREATE PUBLICATION clickpipes FOR TABLES IN SCHEMA "public";
The clickpipes publication defines the set of tables whose change events will be streamed to ClickPipes. We recommend against using FOR ALL TABLES unless you intend to replicate every table, as including unnecessary tables increases WAL traffic from Postgres to ClickPipes and reduces overall replication efficiency.
Add ClickPipes IPs to Firewall
Please follow the below steps to add ClickPipes IPs to your network.
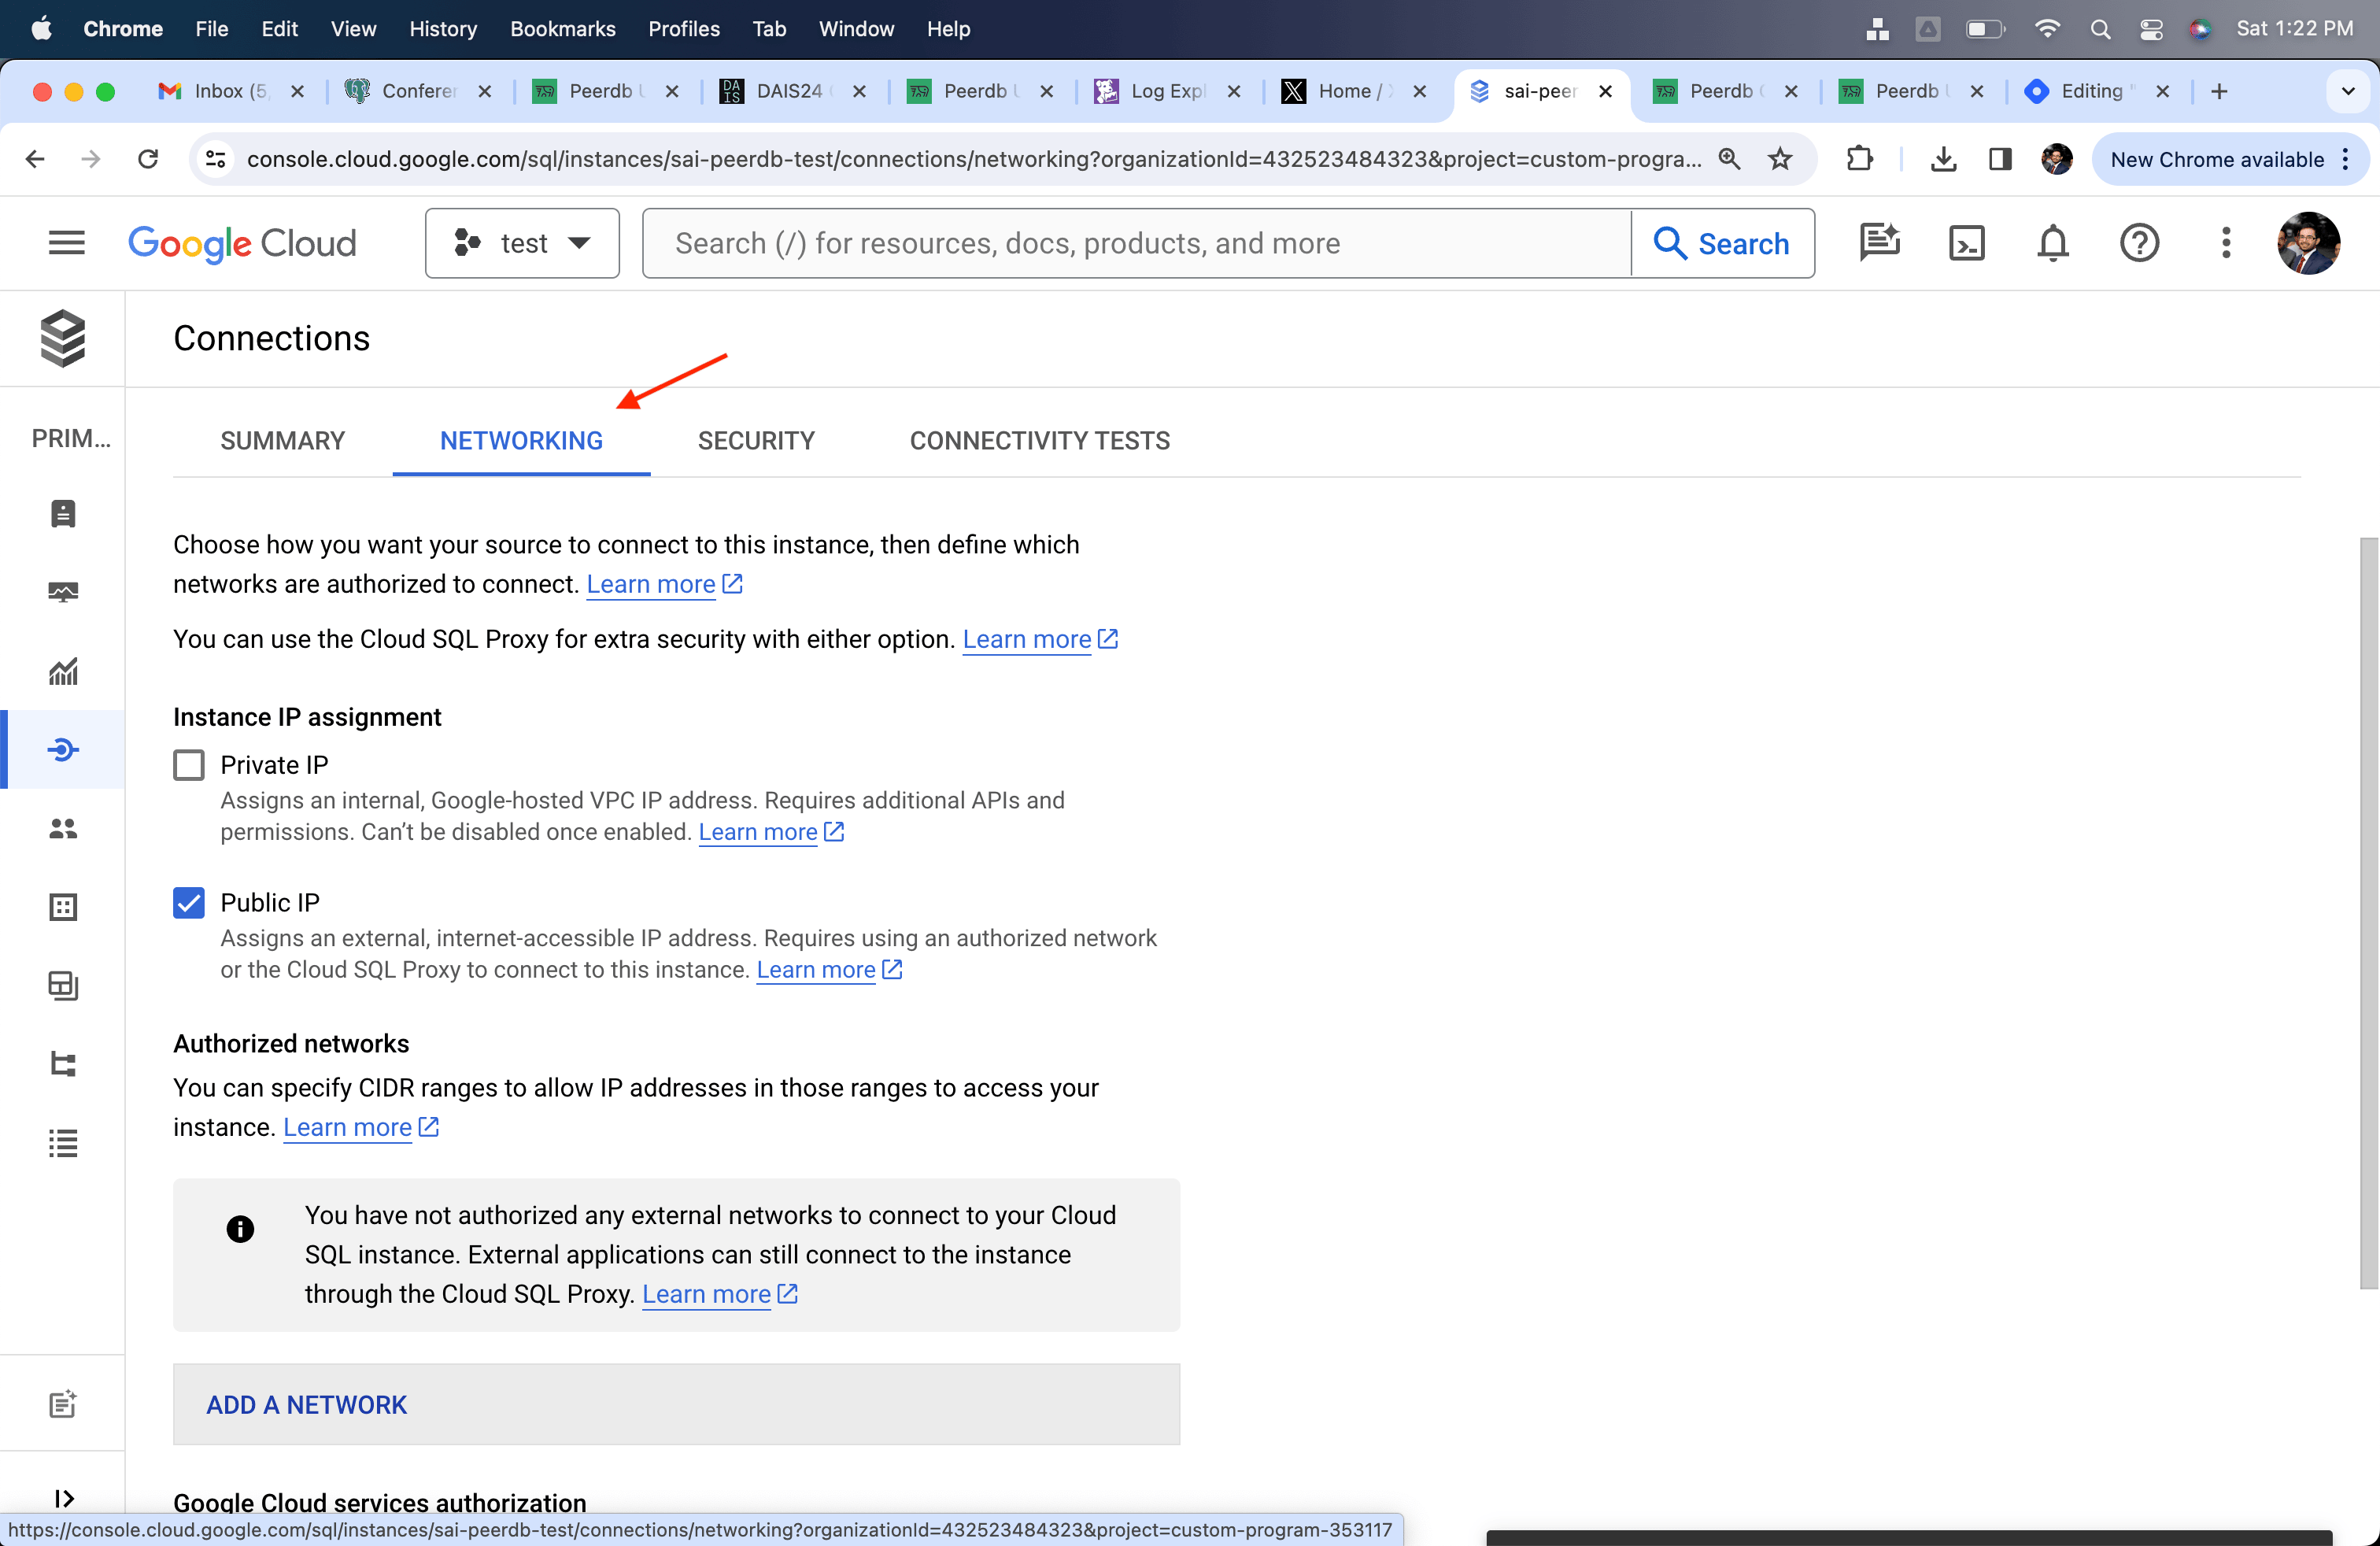
- Go to Connections section
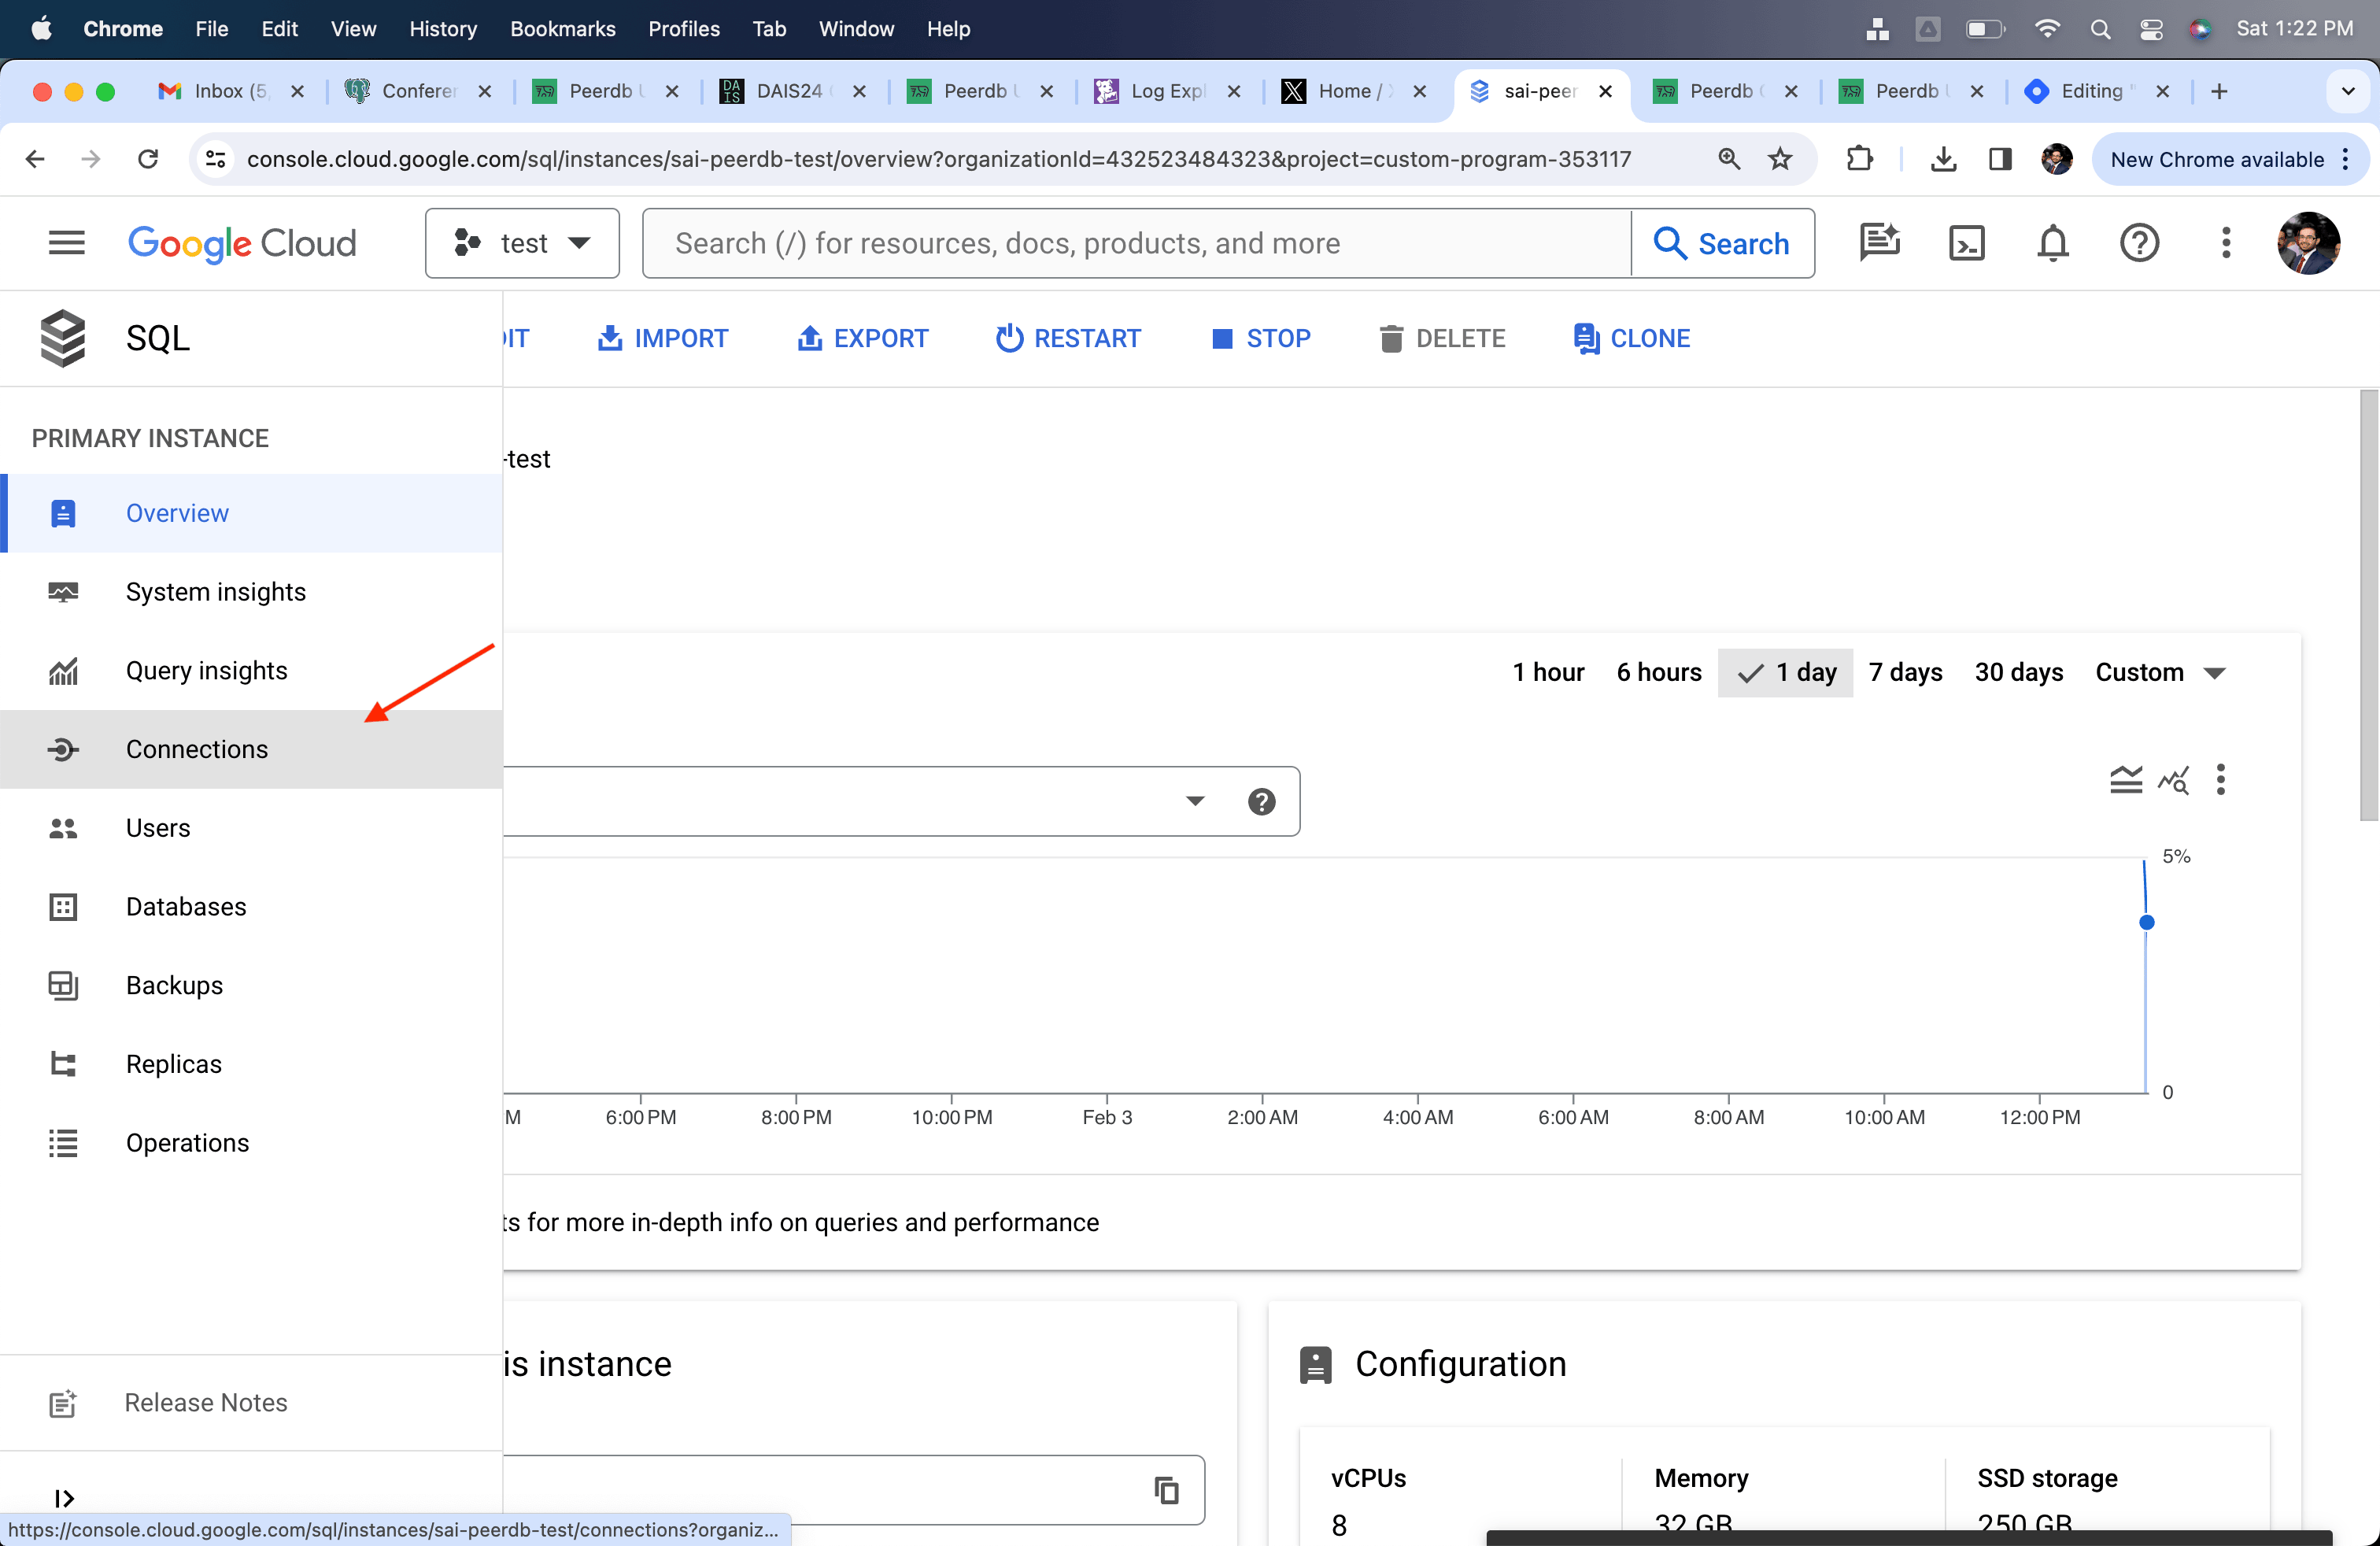
- Go to the Networking subsection
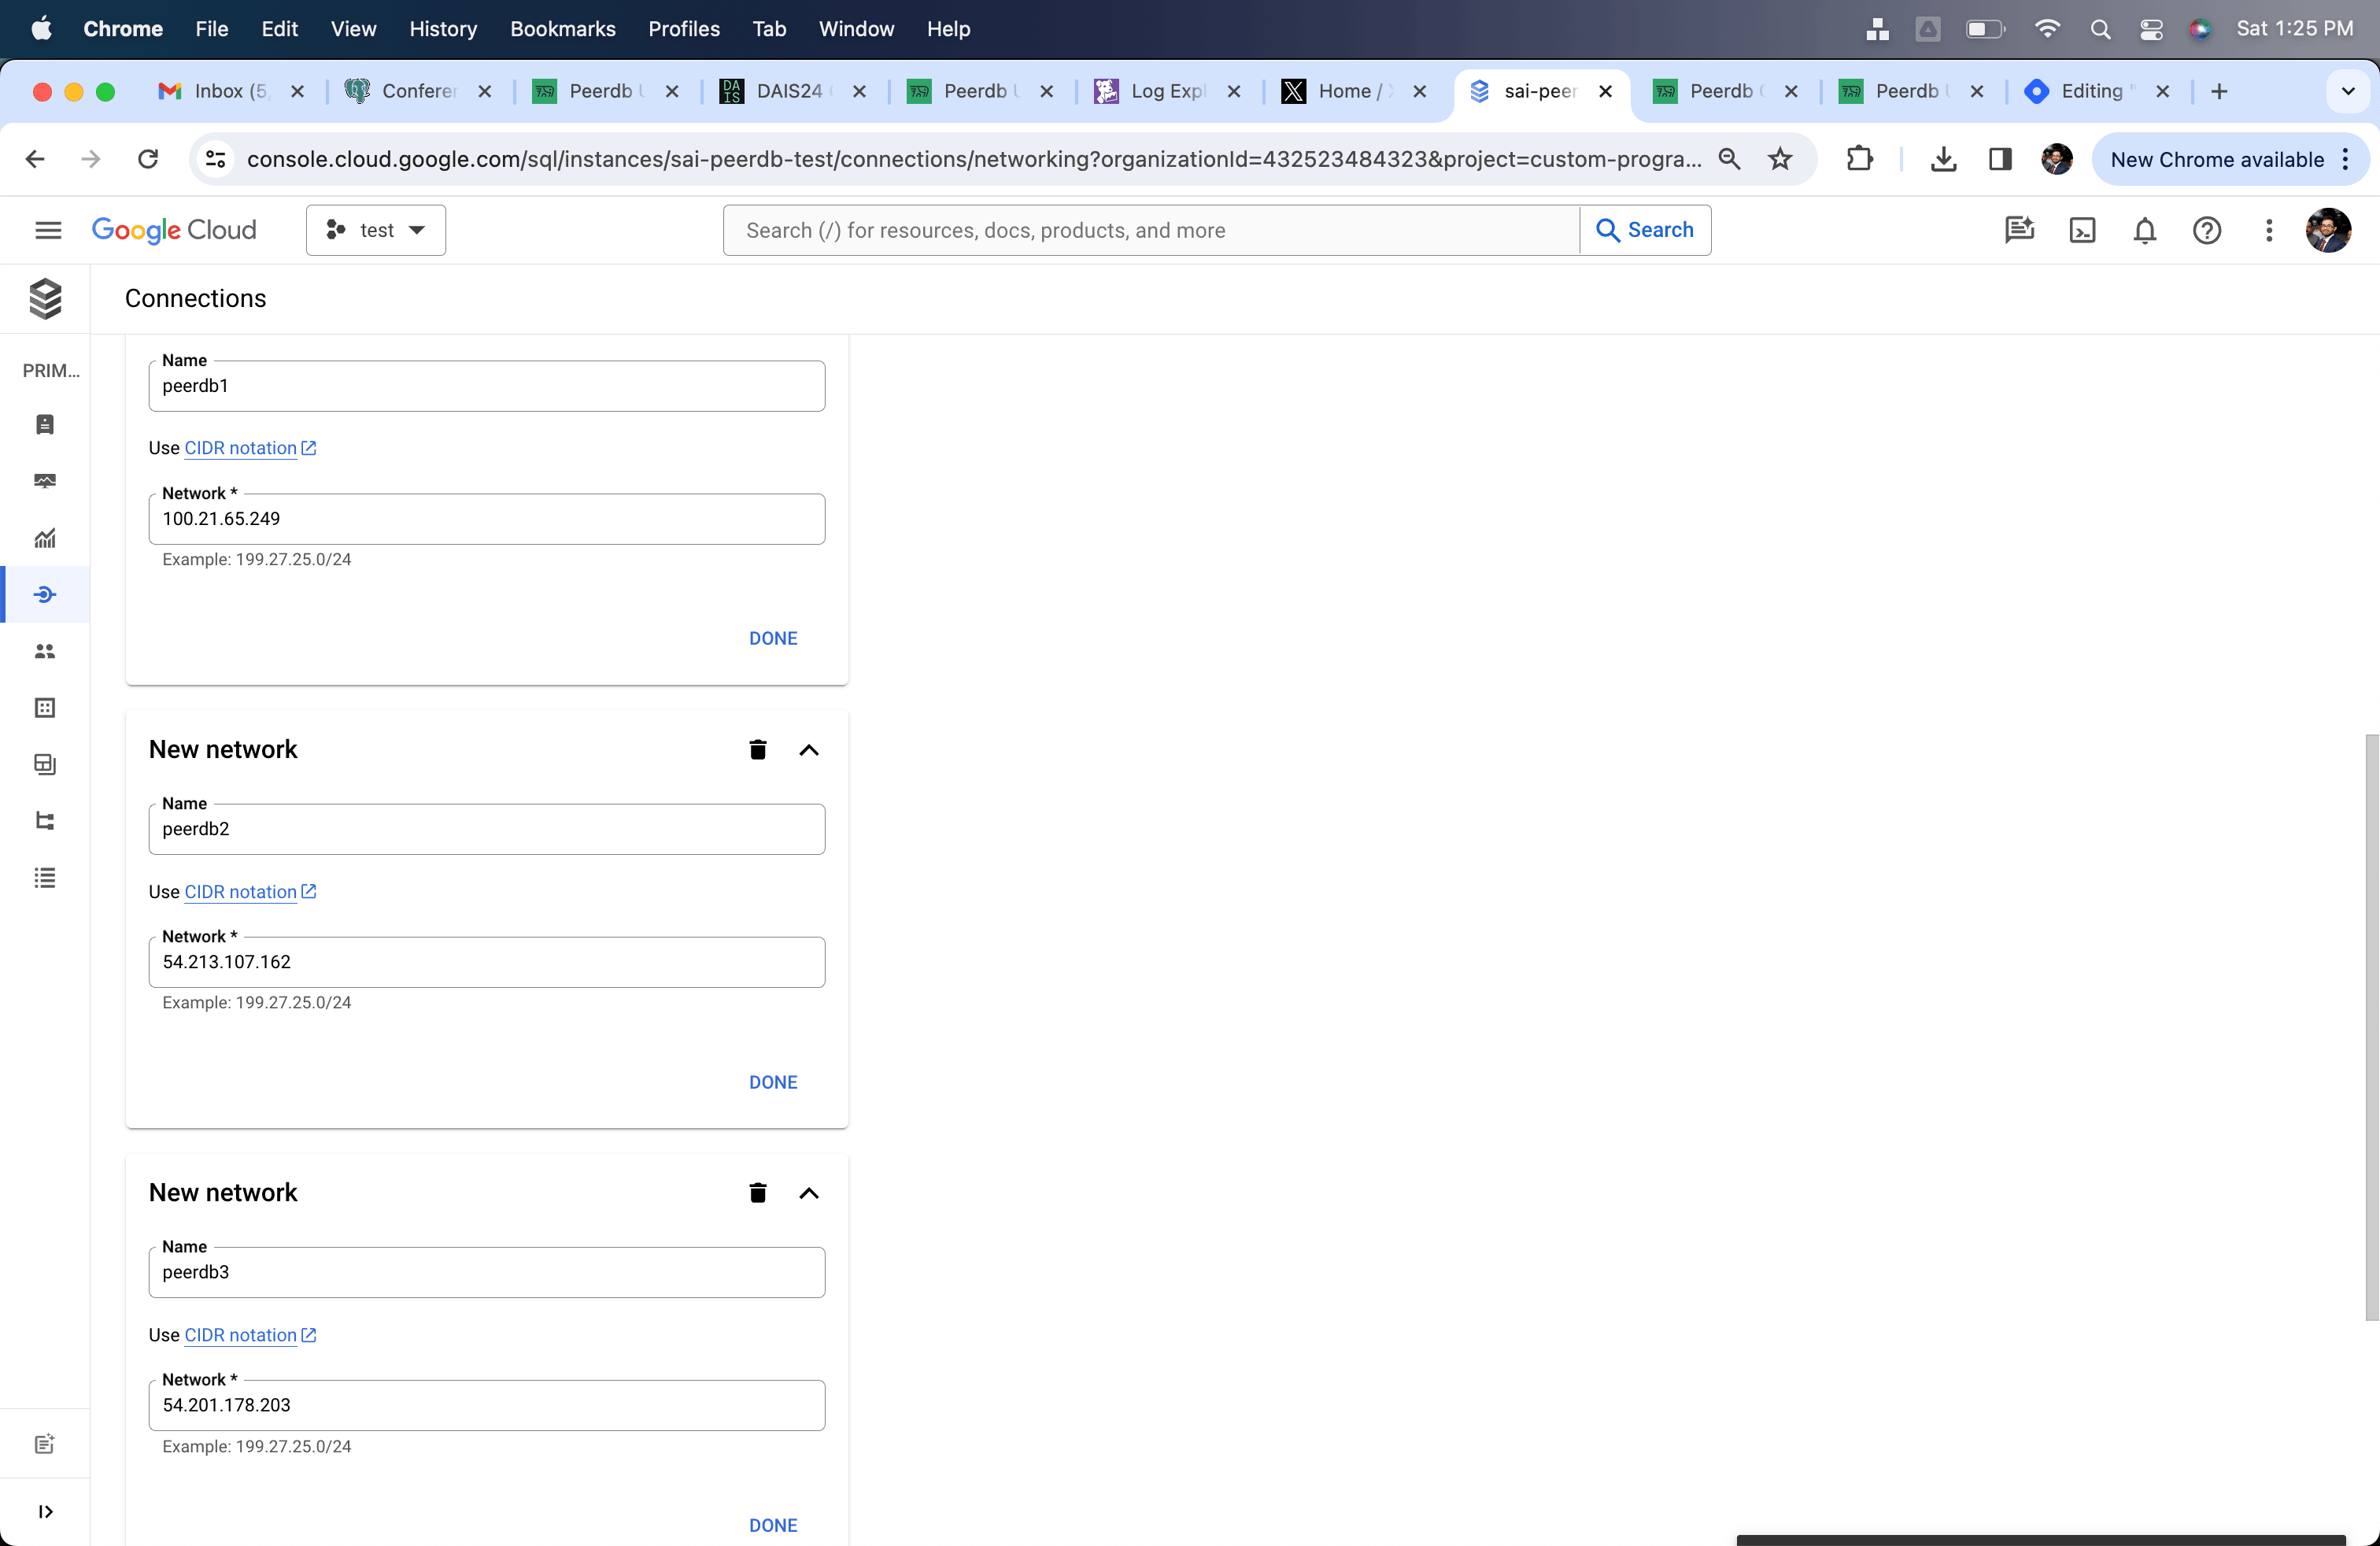
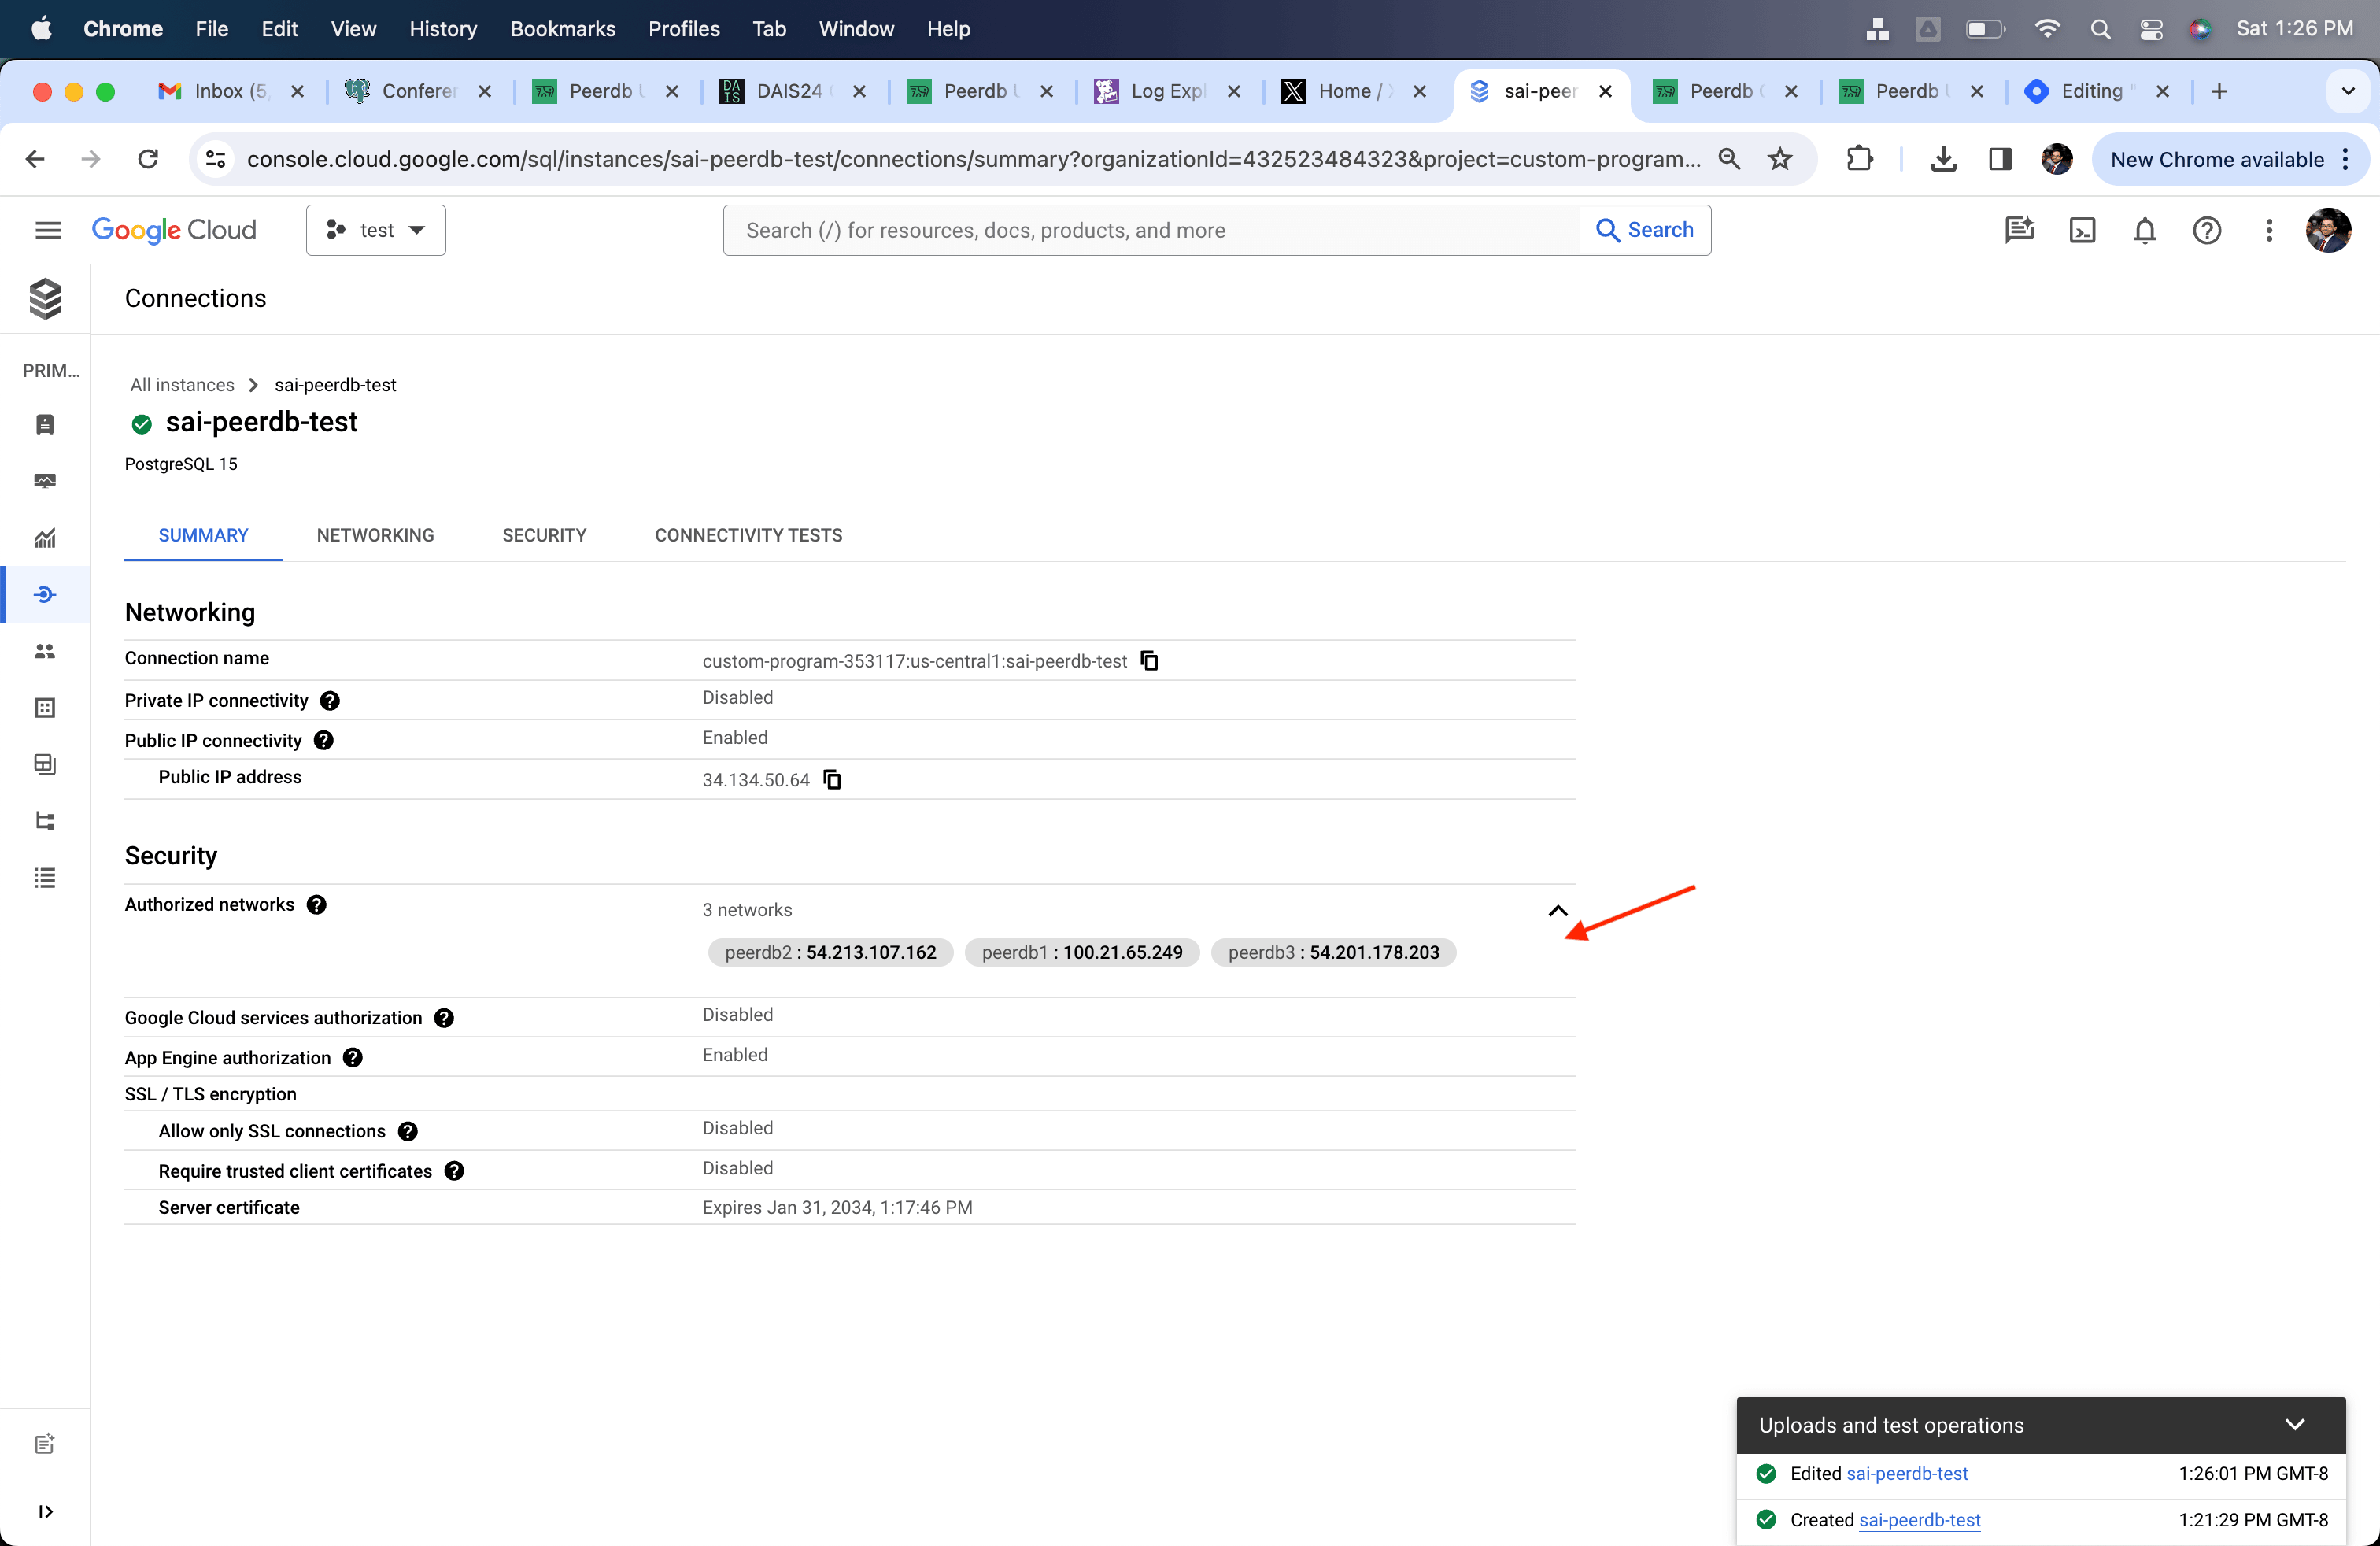
- Add the public IPs of ClickPipes
What’s next?
You can now create your ClickPipe and start ingesting data from your Postgres instance into ClickHouse Cloud. Make sure to note down the connection details you used while setting up your Postgres instance as you will need them during the ClickPipe creation process.